Lesson 3: Creating a Project Directory
Learning Objectives
By the end of this lesson, you’ll be able to:
- Create a project directory.
- Organize files and folders within the project following a given directory structure and naming convention.
Activity - Create a Directory for the Example Project
Your supervisor has given you the directory structure she would like you to use for the student survey data. It looks like this:
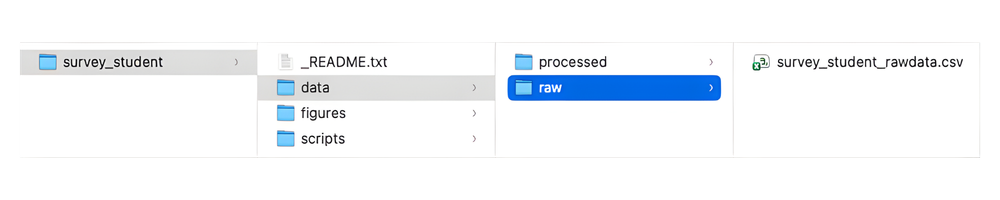
File Naming Convention
Because we won’t be using or creating many files, we can keep our file naming rules simple. We will name the files using the format asset_group_description, where ‘group’ refers to faculty/students, while the ‘description’ tells us more about the purpose of the file.
For example, an R script exploring the student survey data would be called survey_student_data-explore.R, and a raw student survey dataset would be called survey_student_rawdata.csv and once it’s been cleaned and anonymized, survey_student_anonymized.csv.